
Fruity Pebbles Cheesecake Tacos Recipe
Introduction
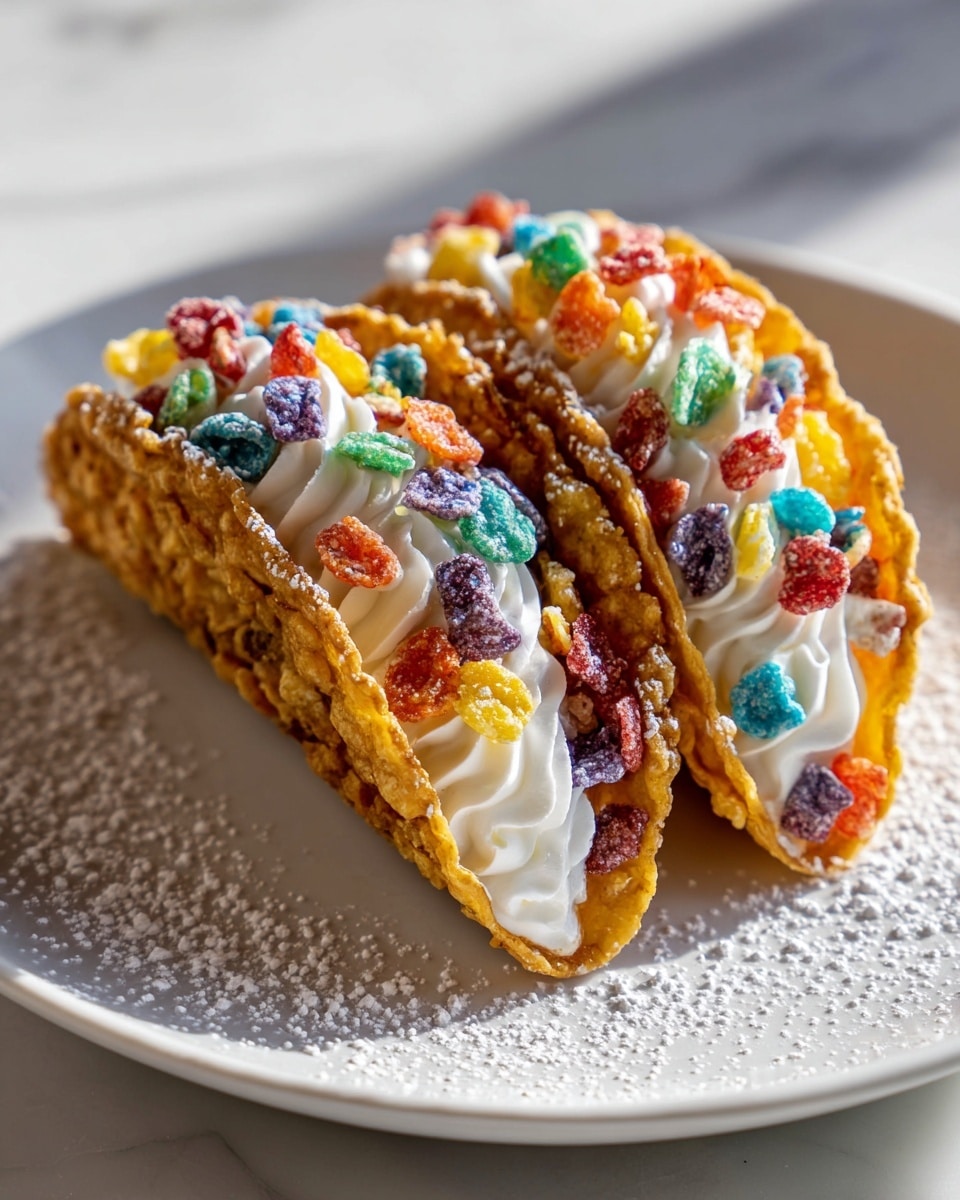
Fruity Pebbles Cheesecake Tacos are a colorful and fun dessert that’s perfect for any occasion. These crispy, fruity taco shells filled with creamy cheesecake and topped with fresh berries and chocolate shavings bring a playful twist to a classic treat.
Ingredients
- 2 cups Fruity Pebbles cereal
- 2 tablespoons unsalted butter, melted
- 1 tablespoon granulated sugar
- 8 ounces cream cheese, softened
- 1/2 cup granulated sugar
- 1/4 cup sour cream
- 1 teaspoon vanilla extract
- 1/4 cup heavy cream
- 1 cup Fruity Pebbles cereal, finely crushed
- Whipped cream
- Fresh berries (strawberries, blueberries, raspberries)
- Chocolate shavings
- Extra Fruity Pebbles cereal
Instructions
- Step 1: In a food processor, pulse 2 cups of Fruity Pebbles cereal until finely ground. Alternatively, place the cereal in a zip-top bag and crush with a rolling pin.
- Step 2: In a medium bowl, combine the crushed Fruity Pebbles, melted butter, and 1 tablespoon granulated sugar. Mix well.
- Step 3: Preheat your oven to 350°F (175°C). Line a baking sheet with parchment paper. Press about 2 tablespoons of the Fruity Pebbles mixture onto the prepared baking sheet in a 4-5 inch circle. Repeat with the remaining mixture, spacing the circles 1 inch apart.
- Step 4: Bake for 8-10 minutes, or until the edges are lightly golden brown and the shells are set.
- Step 5: Remove the baking sheet from the oven and let the circles cool slightly for 1-2 minutes. While still warm and pliable, gently lift each circle and drape it over the bar of an oven rack or the edge of a muffin tin to form a taco shell shape.
- Step 6: Allow the taco shells to cool completely and harden for about 15-20 minutes before removing from the rack or tin.
- Step 7: In a large bowl, beat the softened cream cheese and 1/2 cup granulated sugar together until smooth and creamy using an electric mixer.
- Step 8: Add sour cream and vanilla extract to the cream cheese mixture and beat until well combined.
- Step 9: Gradually add heavy cream and beat until the filling is light and fluffy.
- Step 10: Cover and refrigerate the cheesecake filling for at least 30 minutes to firm up slightly.
- Step 11: Place 1 cup of Fruity Pebbles cereal in a bag and crush finely with a rolling pin or meat mallet. Pour the crushed cereal into a shallow dish.
- Step 12: Dip the edges of each taco shell into the crushed Fruity Pebbles, pressing gently to adhere.
- Step 13: Spoon or pipe the chilled cheesecake filling into each Fruity Pebbles taco shell.
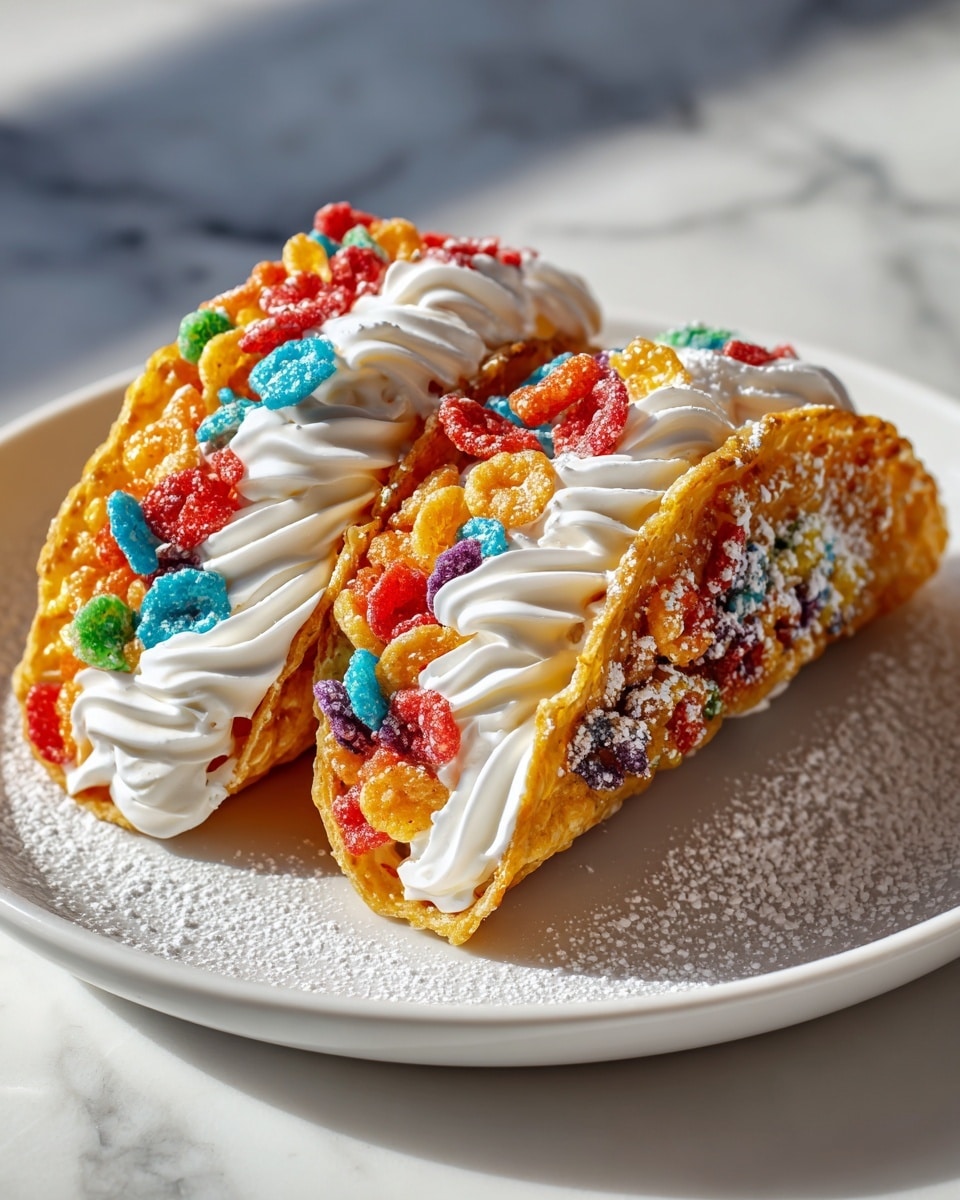
- Step 14: Decorate the tacos with whipped cream, fresh berries, chocolate shavings, and extra Fruity Pebbles cereal.
- Step 15: Serve immediately for the best taste and texture.
Tips & Variations
- Make sure the cream cheese is fully softened to avoid lumps in the filling.
- Use a piping bag to fill the tacos neatly and evenly.
- Try other cereals like Cocoa Pebbles or Rice Krispies for a different flavor.
- Chill the taco shells briefly before coating with crushed cereal to help the topping stick better.
Storage
Store leftover cheesecake filling covered in the refrigerator for up to 3 days. The Fruity Pebbles taco shells are best served fresh, as they can lose crispness over time. If needed, keep shells in an airtight container at room temperature for up to 1 day. Assemble tacos just before serving to maintain their texture.
How to Serve
Serve this delicious recipe with your favorite sides.
FAQs
Can I make the taco shells ahead of time?
Yes, you can bake and shape the taco shells up to a day in advance. Store them in an airtight container at room temperature to keep them crisp.
What can I use instead of Fruity Pebbles cereal?
You can substitute with other colorful cereals like Cocoa Pebbles, Rice Krispies, or even crushed graham crackers for a different flavor and texture.
Print
Fruity Pebbles Cheesecake Tacos Recipe
- Total Time: 1 hour
- Yield: 8 servings 1x
Description
Fruity Pebbles Cheesecake Tacos are a playful and delicious dessert that combines crispy, colorful cereal taco shells with a creamy, fluffy cheesecake filling. Topped with whipped cream, fresh berries, and chocolate shavings, this fun recipe delivers a perfect balance of texture and flavor, ideal for parties or a sweet treat anytime.
Ingredients
For the Fruity Pebbles Taco Shells
- 2 cups Fruity Pebbles cereal
- 2 tablespoons unsalted butter, melted
- 1 tablespoon granulated sugar
For the Cheesecake Filling
- 8 ounces cream cheese, softened
- 1/2 cup granulated sugar
- 1/4 cup sour cream
- 1 teaspoon vanilla extract
- 1/4 cup heavy cream
For Coating and Toppings
- 1 cup Fruity Pebbles cereal, finely crushed
- Whipped cream
- Fresh berries (strawberries, blueberries, raspberries)
- Chocolate shavings
- Extra Fruity Pebbles cereal (optional, for garnish)
Instructions
- Crush the Cereal: In a food processor, pulse 2 cups of Fruity Pebbles cereal until finely ground. Alternatively, place the cereal in a zip-top bag and crush with a rolling pin to achieve fine crumbs.
- Make the Taco Shell Mixture: In a medium bowl, combine the crushed Fruity Pebbles, melted butter, and 1 tablespoon granulated sugar. Mix thoroughly until the ingredients are well blended.
- Preheat and Prepare Baking Sheet: Preheat your oven to 350°F (175°C) and line a baking sheet with parchment paper to prevent sticking.
- Form Taco Shell Circles: Press approximately 2 tablespoons of the cereal mixture onto the prepared baking sheet into circles about 4-5 inches in diameter. Space the circles about 1 inch apart to allow for spreading during baking.
- Bake the Shells: Bake for 8-10 minutes or until the edges are lightly golden and the shells are set and firm to the touch.
- Mold the Shells: Remove the baking sheet and let the shells cool for 1-2 minutes until warm yet pliable. Gently lift each circle and drape it over a bar of an oven rack or the edge of a muffin tin to form a taco shell shape.
- Cool and Harden the Shells: Allow the taco shells to cool and harden completely, about 15-20 minutes, before removing them carefully from the rack or muffin tin.
- Prepare the Cheesecake Filling: Ensure cream cheese is fully softened. In a large bowl, beat cream cheese and 1/2 cup granulated sugar using an electric mixer until smooth and creamy.
- Incorporate Sour Cream and Vanilla: Add sour cream and vanilla extract to the cream cheese mixture and continue beating until well combined.
- Add Heavy Cream: Gradually pour in heavy cream while beating to create a light, fluffy cheesecake filling.
- Chill the Filling: Cover the bowl with plastic wrap and refrigerate the filling for at least 30 minutes to help it firm up slightly for easier filling.
- Prepare Coating for Shell Edges: Crush 1 cup of Fruity Pebbles finely using a rolling pin in a zip-top bag. Pour the crushed cereal into a shallow dish.
- Coat Taco Shell Edges: Dip the edges of each cooled taco shell into the crushed Fruity Pebbles, pressing gently to make the cereal adhere well.
- Fill the Taco Shells: Remove the cheesecake filling from the refrigerator, then spoon or pipe the filling generously into each taco shell.
- Decorate: Top the filled cheesecake tacos with whipped cream, fresh berries, and chocolate shavings for a colorful and delicious finish.
- Serve: For the best taste and texture, serve the Fruity Pebbles Cheesecake Tacos immediately after decorating.
Notes
- Make sure the cream cheese is fully softened to avoid lumps in the filling.
- While baking, watch the taco shells closely to prevent burning since the sugar and cereal can brown quickly.
- Molding the shells while warm ensures they don’t crack and hold the taco shape perfectly.
- If you want firmer shells, let them cool longer before dipping the edges into crushed cereal.
- You can customize toppings with different fresh fruits or sprinkles to suit your taste and occasion.
- Store any leftovers in an airtight container in the refrigerator for up to 2 days, but shells may soften over time.
- Prep Time: 20 minutes
- Cook Time: 10 minutes
- Category: Dessert
- Method: Baking
- Cuisine: American
Keywords: Fruity Pebbles, Cheesecake, Dessert Tacos, No Bake Cheesecake Filling, Fun Dessert, Kids Dessert, Colorful Dessert

